Create A Postcard From Child’s Art

Posted on September 19th, 2013 by Jean

witch natalie_reducedI love my eldest daughter’s drawings. Here are some witches she drew recently. I love the expressive eyes, the assortment of body shapes & sizes, and the atypical colors of their gowns and hats.
 
I thought it would be fun to order postcards with this design. I removed the witches names (Rosie, Athena, Nestella, Dixie and Ivy) and a few ink smears. Then I downloaded the standard postcard template from Vistaprint, and placed the scanned drawing on top. I added the holiday greeting, colorful border and copyright info, then uploaded the completed piece.
 
The smallest quantity is 100 postcards, and including shipping, the cards cost approx. 22 cents each.

Natalie_postcard
 
My youngest daughter was excited to see her sister’s postcard, and asked if she could design one too. Of course I said yes! She actually is a whiz at photoshop, and set up her page to the right dimensions. She drew images on separate layers: the pumpkin twins, the moon full of craters and aliens, pieces of candy, and Happy Halloween!
 
Pearl_postcard
 
A few of you are going to be receiving these in the mail. If you are a friend, a reader, a friendly reader, and would like to receive one of these postcards, send me a message through my contact page.
 
• Do you have a little artist in the family?
• Would you turn your child’s art into a postcard?

5 Ways To Freshen Your Website

Posted on September 15th, 2013 by Jean

I spent the weekend giving my blog a whole new look! Goodbye cleavage, and hello “Skies-the-limit” children.

Here are 5 ways I gave my site a fresh look.

1. Design a new header. Use a favorite photo and a new font in a contrasting color to build a header in Photoshop or other photo-editing program. Free fonts are available at fontspace. Here’s my post to walk you through the steps, PhotoShop Tips.

2. Change background color. I used Color-Hex to identify the colors for my site. I chose sky blue #60b0ff. Depending on your theme, you may need to change the code in your stylesheet.css file.

3. Add a gradient. Scrolling from the top of my site to the bottom, the background color gradually changes from blue to yellow. I accomplished this by following the instructions at ehow.

4. New social icons. Onextrapixel has freebies including the Round Social Media Icons Pack. Upload them to your library, and place the url addresses in your header.php file. When you link to Twitter, Facebook, Pinterest and the like, be sure to enter the Four Little Words to keep your readers from straying.

5. Declutter the sidebar. I removed campaigns that weren’t working for me (adsense, amazon associates), code that had a glitch (networked blogs), and links to peers who are no longer blogging.

TIP: When your website makeover is complete, freshen your social sites too!

• Have you recently freshened your site?
• What one thing would you change on your website?

Make A Party Invitation in 20 Minutes

Posted on November 5th, 2011 by Jean

Friday morning I was given the assignment by my soon-to-be 9 year old to create birthday party invitations for her to hand out THAT MORNING. No, I hadn’t planned ahead. She’ll have a handful of girlfriends over next Saturday, and I intend to just phone their parents. But, none the less, I was up to the challenge.
 
Step 1: Visit Dreamstime. This is my go-to source for graphics.
 
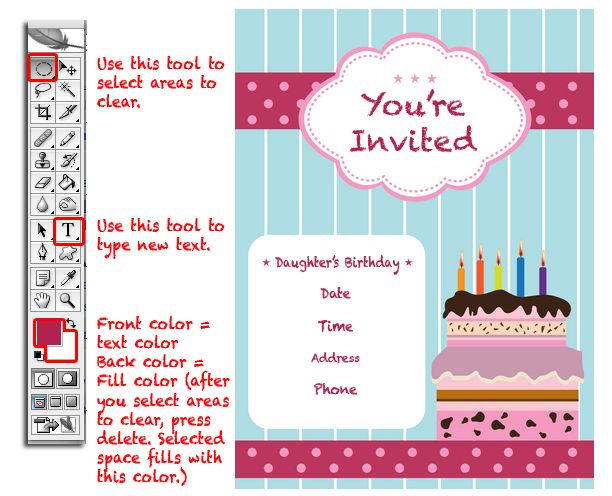
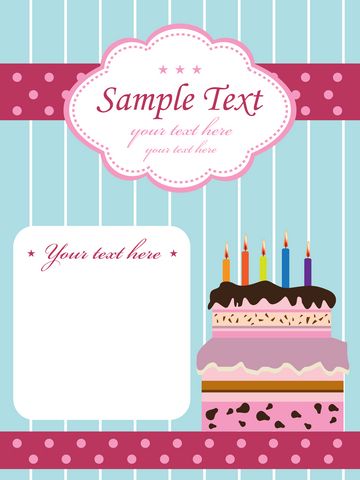
Step 2: Search for party invitations. You’ll find a wide variety, from “free” to “you’ve got to be kidding me”!
 
Step 3: Buy a few credits and download your favorite image. I found this cute invitation for 3 credits (approx. $3.75).
 
Step 4: Edit in Photoshop. See notes below. When editing is done, choose Layers, Flatten Image to merge all layers into one.


Step 5: Save & Print. I created a new, blank Photoshop page, 11×8.5 landscape orientation, and dragged (with my pointer tool) the invitation to it twice. Two invitations fit on one page. I used brochure paper (heavy stock with a nice finish).
 
Step 6: Cut. Remove the white border, and cut out the 2 invitations. Repeat as necessary.
 
For an in-depth tutorial on adding text, view my post Photoshop Tips V: Add Text to Photos.
 
• Do you have a go-to source for graphics?
• Store-bought or home-made invitations?

Menu

© 2014 JEAN HAS BEEN SHOPPING. ALL RIGHTS RESERVED.