Mini-Challenge #3: GIVE

Posted on July 28th, 2009 by Jean

Like the Red Hot Chili Peppers said, “Give it away, give it away, give it away now!”

Mini-Challenge #3: GIVE

If you accept the Challenge to Give, post your blog of give-aways by Tuesday, August 4th. I will link to all participants on the 4th.

Now for my give-away!

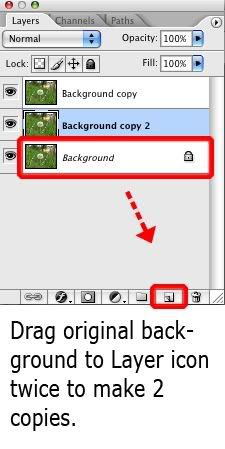
I have duplicate issues of PhotoShop User magazine. Many of you use or have an interest in PhotoShop, so I will give away these issues.

Rules:
• First come, first serve.
• 1 issue per person/household
• Specify the issue you want.
• Postage will be paid by me.
• If I do not already have your mailing address, msg me.

Thanks for reading!


1) July/Aug. 2005: PhotoShop in Motion ~ Photorealistic Techniques ~ Camera Raw 3 To Goddess Anesidora


2) March 2006: Adobe Lightroom ~ Wacom tablet (pen) ~ Color Diagnosis TO GOOFYMOMOF4


3) December 2005: 100 PhotoShop (CS2) Cool Tips ~ Vanishing Point ~ Create Color Profiles TO GEORGIA


4) Apr./May 2006: Use PhotoShop w/Illustrator ~ Turn Photos Into Drawings ~ Shape Warp ~ Photographing Animals in studio TO STEVE


5) Apr./May 2008: After Effects CS3 & PhotoShop CS3 ~ Wedding Photography ~ Create Smooth/Silky Skin ~ Master Lightroom print module TO VALERIE


6) June 2006: Design DVD menus ~ Photoshop w/Video create artsy pencil-sketch effects ~ Design Multi-Layered Title Page ~ What Separates amateur from pro shooter? TO GARDEN GODDESS


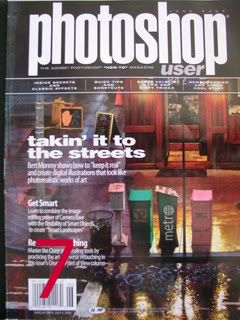
7) June 2005: Create Digital Illustrations that look Photorealistic ~ Combine Camera Raw w/Smart Objects to create Smart Landscapes ~ Master Clone and Healing Tools

Note: The descriptions are summaries from the covers. PhotoShop User magazines are filled with articles, tips and ideas.

PhotoShop Tips III: Make Photos POP

Posted on June 17th, 2009 by Jean

PhotoShop Tips III: Make Photos POP + Spotlight Effect

Step 1: In your Layers Window, drag Background to the layers icon twice to make 2 additional layers.

Step 2: On your top layer, choose Image, Adjustments, Desaturate. In your Layers Window, change the blending mode to Overlay.

Step 3: On your 2nd layer, choose Filter, Blur, Gaussian Blur. Set the pixels to 2.5. Change blending mode to Overlay.

OPTIONAL Step 4: On top layer, choose Filter, Render, Lighting Effects. In the Style Drop Down Tab, choose 2 o’clock spotlight. Center your white weight point, and pull your upper weight point to the top right corner.

Step 5: Layer, Flatten Image. File, Save As.

You can experiment with this effect. In another of my photos (Mi Casa), I desaturated the top layer (blend mode: overlay) and reduced opacity to 20%. I also did not include a 2nd/blurred layer, nor incorporated the spotlight.

Thanks for reading!

Picture of the Day ~ Week 1

Posted on June 6th, 2009 by Jean

My friend, Jim is blogging one photo per day. He was inspired by our friend, Amy’s World. They have both inspired me to start carrying my camera with me everywhere, and to snap at least one photo a day. Here is my first week.

Sunrise

Colorful Arizona Sunrise ~ May 30, 2009

Swinging

Pearl swinging ~ May 31, 2009

Purple Paddle Cactus

Maverick Gas Station, Bullhead City AZ ~ June 1, 2009

Produce Cactus

Smith’s Grocery Store, Fort Mohave AZ ~ June 2, 2009

Best Mexican Food…

… in Hell. ~ June 3, 2009

Mesquite Tree

Shading our yard ~ June 4, 2009

Leaving Las Vegas

Las Vegas Strip ~ June 5, 2009

• BLAST FROM THE PAST •

Flamingo Duck

San Diego Zoo ~ June 30, 2008

Thanks for reading!

Menu

  • [instagram-feed]
  • Enter your email address:

    Delivered by FeedBurner

     
    Follow on Bloglovin

  • SPONSORS


    Stock Photos & Images

© 2014 JEAN HAS BEEN SHOPPING. ALL RIGHTS RESERVED.