My friend, Jim is blogging one photo per day. He was inspired by our friend, Amy’s World. They have both inspired me to start carrying my camera with me everywhere, and to snap at least one photo a day. Here is my first week.
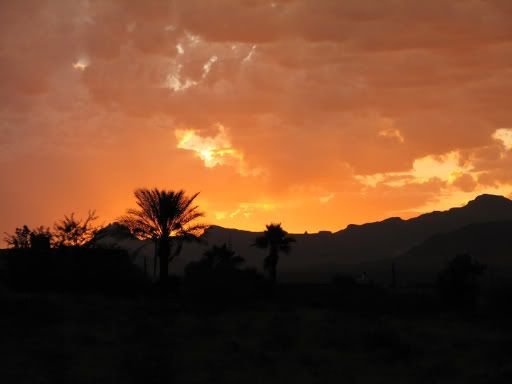
Sunrise Colorful Arizona Sunrise ~ May 30, 2009
Swinging Pearl swinging ~ May 31, 2009
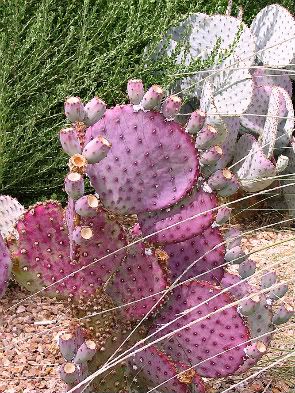
Purple Paddle Cactus Maverick Gas Station, Bullhead City AZ ~ June 1, 2009
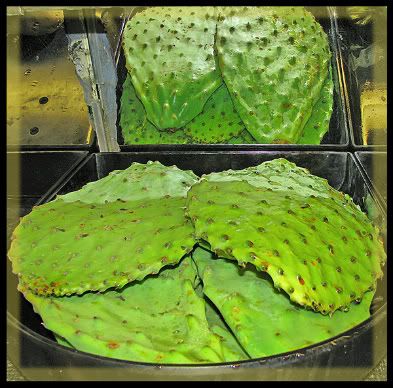
Produce Cactus Smith’s Grocery Store, Fort Mohave AZ ~ June 2, 2009
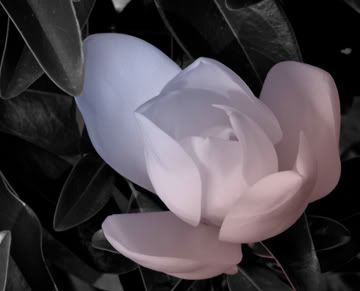
Special thanks to GoofyMomof4 for requesting this tutorial. This is part 2 of 2. Part 1 demonstrated adding the original color back in to a b&w. Part 2 introduces NEW color to a black & white photo.
Photoshop Tips II ~ Part 2 of 2: Adding NEW Color to B&W
I’m using Photoshop 9 (CS2) for the demonstration. Written instructions follow.
IMPORTANT: Opacity on Gradient Fill was reduced to 25%.
NOTE: Be sure your Photo Mode (Image, Adjust, Mode) is RGB.
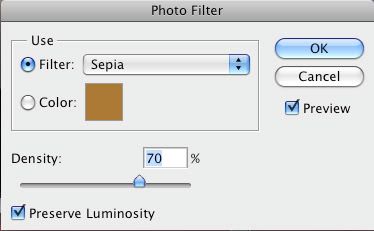
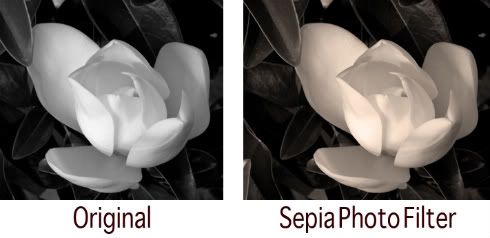
SEPIA
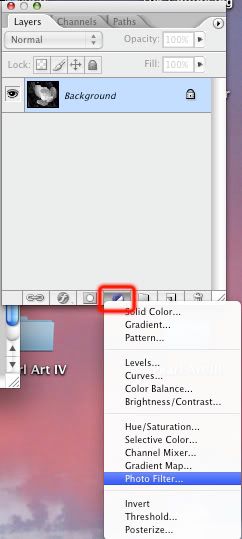
In your open Layers Window, click on the circular icon which is half black/half white. Scroll down to Photo Filters.
These are your pre-set PhotoShop Photo Filter effects. Choose Sepia, and adjust the density to your liking.
To save this look, merge layers (flatten image), and save.
GRADIENT COLOR
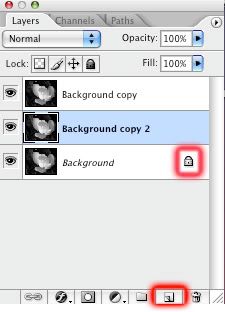
The original photo is locked. In the Layers Window, drag the photo (named Background) to the Layers Icon (highlighted in red below), and repeat. You should now have 3 layers of the same photo.
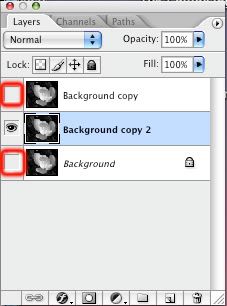
Turn off (click on the eye) the locked layer and the top layer. Make sure your middle layer is selected in your Layers Window.
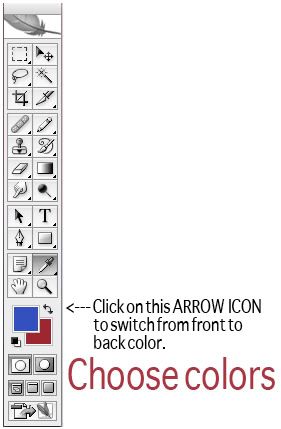
On your tool bar, select your colors.
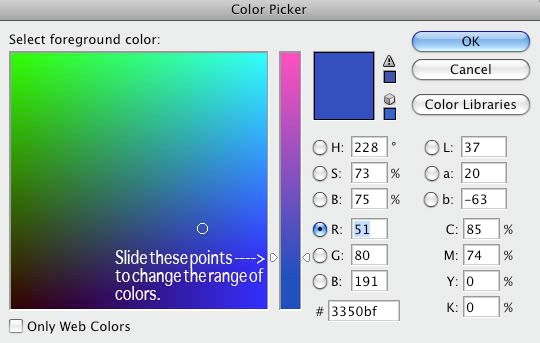
Within your Color Picker window, your options are endless.
Once you have selected 2 colors, click on your Gradient Tool (it may be hiding behind your paint bucket).
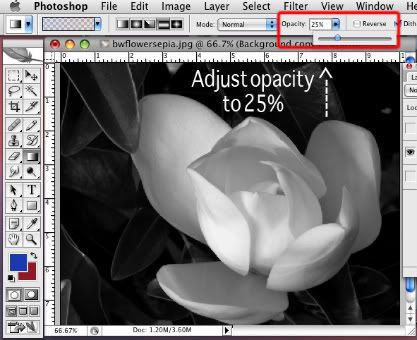
I neglected to cover this step in the video, but lower your gradient opacity to 25%.
Holding your shift key down, draw a straight line with your mouse depressed, and release. The color will fill the entire image.
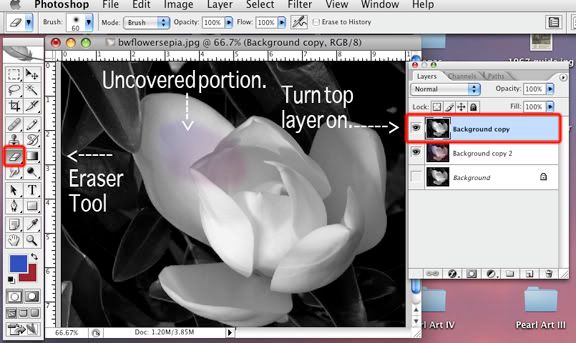
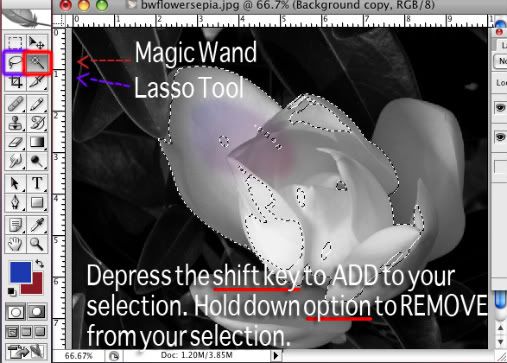
Turn on your top layer within your Layers Window (click on the box, and the eye will appear). Your image will now appear black & white. Make sure you have selected your top layer (lighted in blue below). You can use your Eraser Tool to remove the portions you would like to appear in color.
You can also use your Magic Wand tool – With your shift key depressed, tap the areas of the photo to select them.
Or use your Lasso tool – Depress your shift key and Lasso your selections. To remove portions for your selection, hold down your option key, and lasso the area which you’d like to remove.
When your selection area is complete, hit the delete key. You are now ready to Flatten Image (Layer, Flatten Image), and Save As to rename your completed photo.
Let me know if you have any questions or suggestions for the next tutorial.
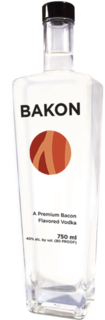
It’s currently available in Washington and Oregon, and is a key ingredient in Bakon Marys and Bakon Chocolate Martinis.
The combination of bacon and chocolate sounds good, like the candy bar Vosges in Vegas offers. I think I’d mix hot cocoa with the bacon vodka and top with marshmallows or whipped cream.
Speaking of candy, our daughter is attending 2 weeks of Candy Camp. It’s offered through her school. In the mornings, they make candy, and in the afternoons, they have their regular corriculum. Yesterday she made chocolate covered pretzels, and today she made rice krispy treats. I’m excited to see what she’ll bring home next.
Alright, the kids are cha-cha’ing all over the house. I’d better go chase them around. Where’d I leave my cocktail?