


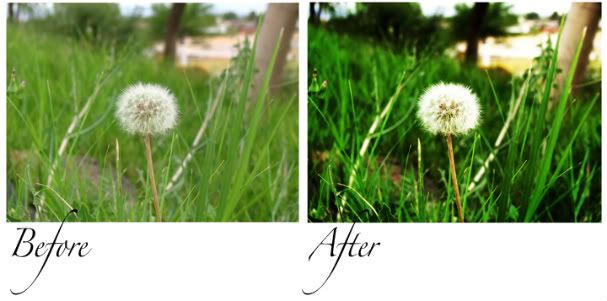
PhotoShop Tips III: Make Photos POP + Spotlight Effect
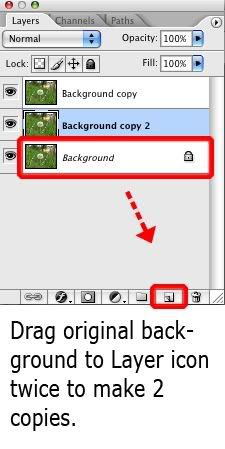
Step 1: In your Layers Window, drag Background to the layers icon twice to make 2 additional layers.
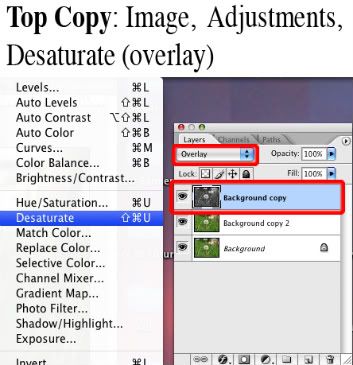
Step 2: On your top layer, choose Image, Adjustments, Desaturate. In your Layers Window, change the blending mode to Overlay.
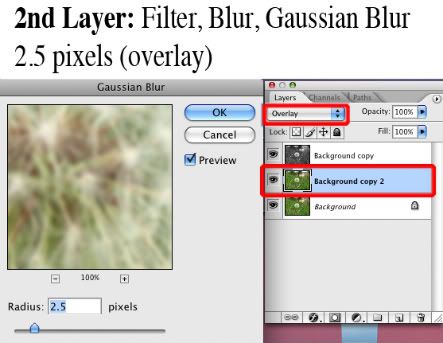
Step 3: On your 2nd layer, choose Filter, Blur, Gaussian Blur. Set the pixels to 2.5. Change blending mode to Overlay.
OPTIONAL Step 4: On top layer, choose Filter, Render, Lighting Effects. In the Style Drop Down Tab, choose 2 o’clock spotlight. Center your white weight point, and pull your upper weight point to the top right corner.

Step 5: Layer, Flatten Image. File, Save As.
You can experiment with this effect. In another of my photos (Mi Casa), I desaturated the top layer (blend mode: overlay) and reduced opacity to 20%. I also did not include a 2nd/blurred layer, nor incorporated the spotlight.
Thanks for reading!


Comment By: Amy
June 19th, 2009 at 6:15 pm
Ok. That does it. Now I HAVE to get photoshop. That looks like fun.
Comment By: jeanhasbeenshopping
June 19th, 2009 at 6:17 pm
Yay! Amy saves the day! I should give you PhotoShop!
Comment By: Amy
June 24th, 2009 at 5:36 am
I have the discs around here somewhere but they’re from…..before I had stretch marks…..um……14 years ago? So technically that would be ethical if I merely upgraded with yours, right??
Comment By: jeanhasbeenshopping
June 24th, 2009 at 7:15 am
Sounds ethical to me!