


Thank you to Steve for this tutorial suggestion.
Part 1: Downloading Fonts from the Internet
Check out FontSpace.com for free fonts.
Choose your free font, download it, and unzip it (doubleclick on the zipped file). It will appear in your download folder.
Launch your MAC hard drive (click on Finder or the icon for your hard drive). Click on System, Library, Fonts. Drag the new font file from the download folder to the font folder. If your computer requires a password to add fonts or programs, you will be prompted to enter your code. The font is now in your system, and will appear when you launch your applicable programs.
Part 2: Adding Text to Photos
Step 1:
Launch PhotoShop and open the jpg file you would like to work with.
Step 2:
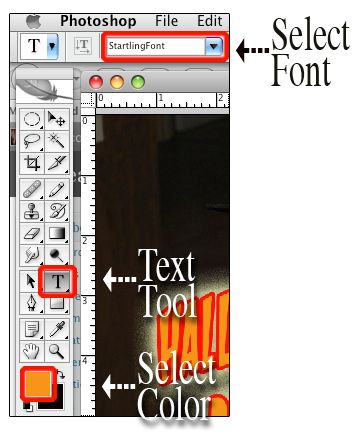
Select your Text Tool (the uppercase T on your side toolbar). Drag your mouse over the area of the photo where you will type text. Font selection is on your upper toolbar. Scroll through the fonts and make your selection. You can also select color via your side toolbar.
Step 3:
Type your text. To quickly change the font size, depress Apple plus A, and tap your > or < keys (greater than or less than). While on your pointer tool you can drag your text anywhere on the photo.
Step 4:
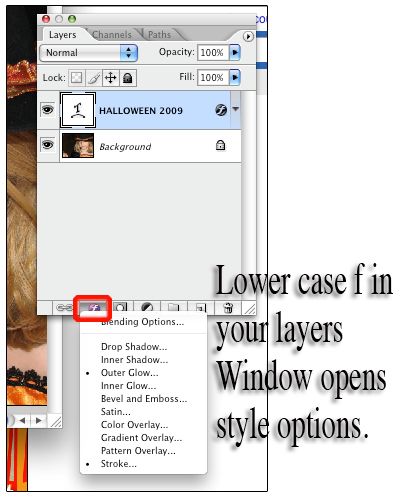
Make sure your Layers window is open (Window, Layers). Click on the lowercase f to make style changes to your font. Options include Drop Shadow, Stroke and Outer Glow. Experiment with the options. You will see the previews for these styles on your text prior to clicking OK. You can simply hit Cancel if you do not like the effect.
Step 5:
To warp text, click on the lopsided, underlined T on the top toolbar.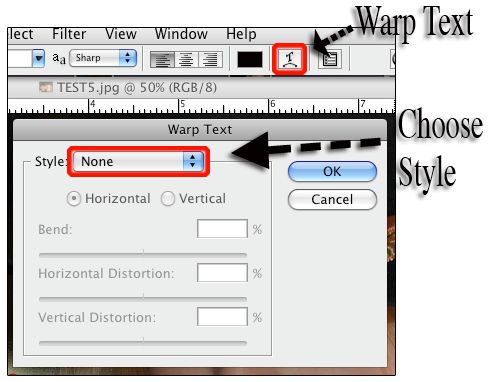
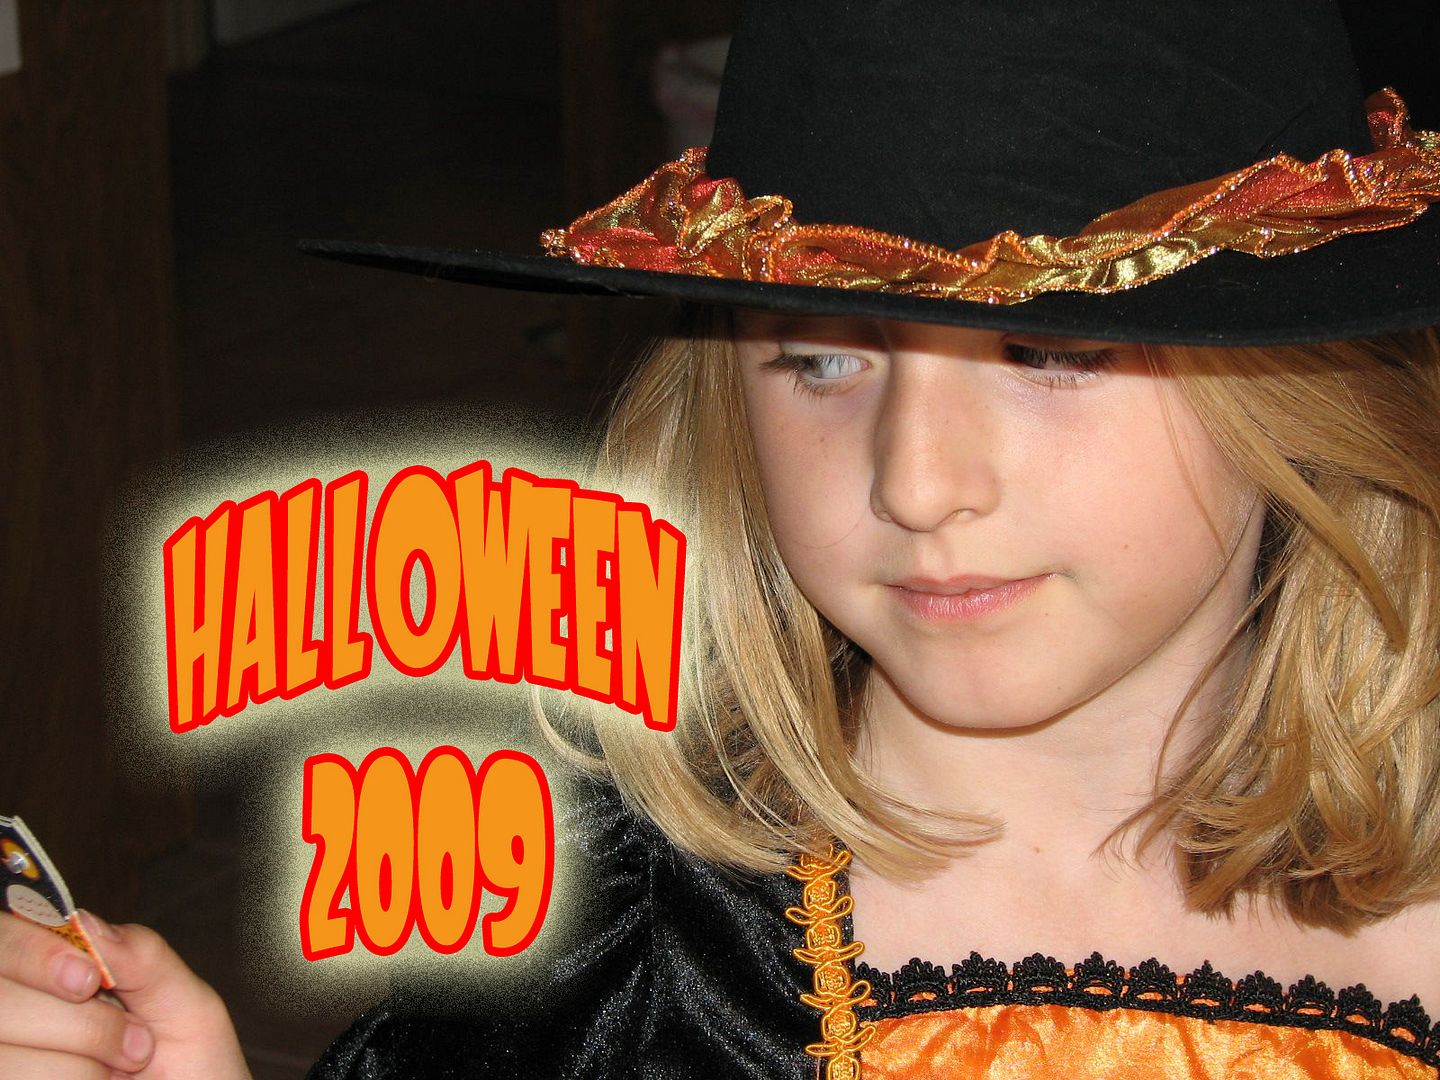
Step 6: When you are satisfied with your text, combine the layers. Layers, Flatten Image. Then Save As (change the name of the jpg if you do not want to damage the original file.
Upcoming tutorials may include the scrumptious Mayflower Martini and finding my own a** with both my hands. Some say that later one can’t be done.
Remember, I’m always open to your suggestions.
Tags: fonts, free, how to, jpgs, layers, Photoshop, styles, text, Tips, tutorial, Video, warp


