Special thanks to GoofyMomof4 for requesting this tutorial. It will be presented in 2 parts. Part 1: Adding the original color back in to a b&w. Part 2: Adding new color to a black & white photo.
Photoshop Tips II ~ Part 1 of 2: Adding Original Color to B&W
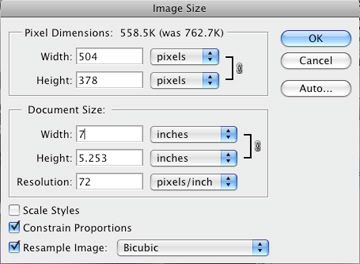
I’m using Photoshop 9 (CS2) for the demonstration.
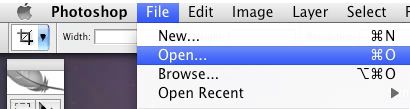
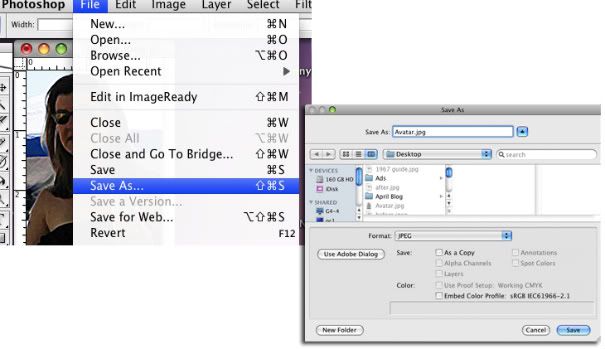
Open the jpg you are working with. You need to have 2 copies of this same photo. A quick way to copy the photo is to rename it (Save As a different name). Then open the original jpg again. You should have both photos on your screen.
1 photo, 2 names.
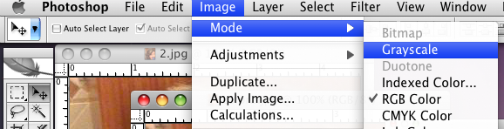
Change one of your photos to black & white: Image, Mode, Grayscale
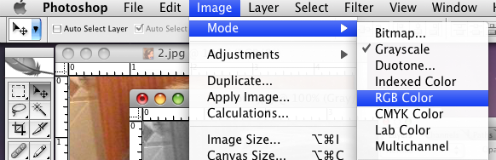
To make the photos compatible again, return the b&w photo to RGB Color: Image, Mode, RGB Color (The color will remain black & white. Only the mode has changed.)
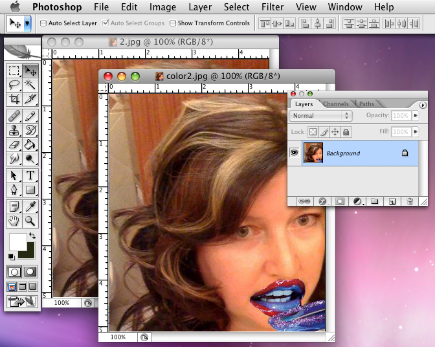
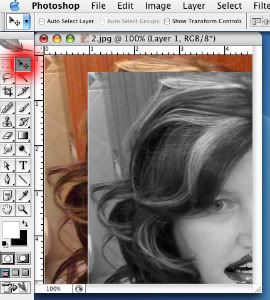
Using your Move Tool (highlighted in red below), drag the b&w photo onto the color photo. (You can close the b&w photo now.)
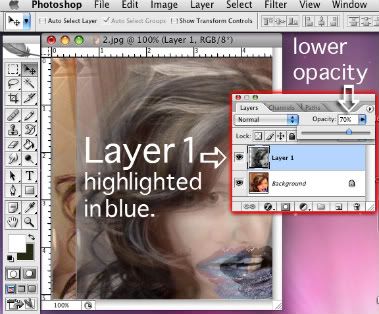
For the next part, your Layers Window must be open. Choose Window, Layers. A check mark should be next to Layers.
Make sure you are on Layer 1 (highlighted in blue within your Layers Window). Lower the Opacity so you can see through your b&w photo. (70%).
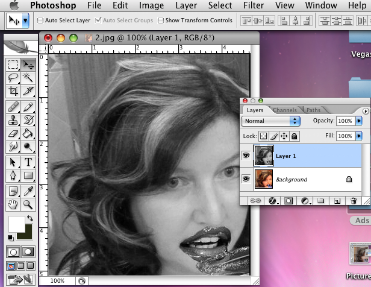
Use your Move Tool to align the photos, then return opacity to 100%.
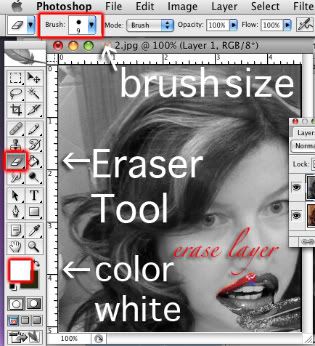
Grab your Eraser Tool, choose brush size, and make sure your color selection is white. Begin erasing portions of your b&w photo to reveal the color photo underneath.
When you have more than 1 layer, your jpg becomes a psd (PhotoShop Document) file. When you are done with your project, save your working file (your psd) if you intend to make changes. Then merge layers or flatten image (both options work). Layer, Merge Visible or Flatten Image, and Save As a jpg.
Finished project ~ Scary!
If you have any questions or suggestions for the next installment, please let me know.
Thanks for reading!
Update: If I had to do this over again, I would copy the original layer, and then desaturate that top layer. Using my eraser tool, I would erase portions of the b&w layer. I’m leaving this tutorial as is in the hopes that it may still inspire and/or teach someone a new trick.
Tags: Black and White, Color, CS2, how to, Photoshop, Tips, Tricks, Video